HOW TO MAKE YOUR OWN DRAGON...
Retour Page d'accueil
! NOTE DU WEBMASTER A NOS VISITEURS FRANCOPHONES !
Chers visiteurs,
Cette section est principalement destinée aux fans anglophones de Panzer Dragoon, c'est pourquoi elle est exclusivement en anglais.
SymbioS & Zzoull
|
The aim of this section is to explain how to make a small scale dragon by yourself. My english is not as good as my french, so I apologize for the mistakes. I just hope you'll be able to understand my explanations ! NB : pictures were shoot with a scanner, sorry for their poor quality. TOOLS AND MATTER : The following pictures shows the tools I use to make my dragons :
You can find these tools in any Beaux-arts store. You must have : - 1 spatula - 1 scalpel - Colour shapers - 1 pair of pliers + Wire cutters - 1 water bowl - for Milliput - 1 piece of rag - Sandpaper - Wires - Thin cardboard - Milliput white and Milliput silver : for further informations about this matter, please visit their website : www.milliput.com NB : I use Milliput cause it's easy to purchase in France. But if you can find matter like Super Sculpey or Magic Sculpt, it's the same thing, but cheaper. Unfortunately, it only exists in the US, I didn't find it in Europe. These tools are not expensives, and they're essential to sculpt any model. THE MODEL : For this tutorial, I choose the Valiant wing Dragon, the Type 1 in Panzer Dragoon Saga. It's not my favourite, but I think it's a good example. When you choose a model, be sure you'll be able to make it. And try to get all the artworks you can, in order to have a lot of points of view (model is in 3D, of course). Here is the picture I mainly use :
STEP 1 : the Socle (or pedestal) : Before making the socle, you must choose the position of your dragon : will it be "flying" (like my Solo wing) or "walking" (like my Base Wing) ? For walking position, you can make a plate socle, and sculpting ground effects on it, like sand, rock... or anything else. For flying position, it's harder to find a good effect. I never know what kind of thing I'm going to sculpt. That's why I always make a (stupid) rock, in order to hold the wire which is going to support the dragon. This is the way I choose for my Valiant :
STEP 2 : the framework (or armature) : This is an essential step in fact. A good framework will give to your model a good posture. It's important, so be careful when you make it. You must first determinate the scale of your model. For example, mines are 1/100 scale. That's why the Valiant is 7cm length, but the armature is 9cm length. On this picture, you can see how I try to give a dynamic position to the framework :
STEP 3 : Making of the Body : First, I cut a piece of Milliput Silver, which is enough to make this part of the model. I applied it on the framework, and I worked it in order to obtain the body form. I also had enough putty to work the legs. Then, with the spatula, I made the skin details :
STEP 4 : Making of the body Shell : Body shell is made of Milliput White. This putty is thiner than the Silver, so I recommend it for this kind of work. I applied the putty along the body. Then, with the scalpel, I cut it to obtain the general form of the shell on the skin. Finally, make the details with the colour shaper :
STEP 5 : Making of the Head : The dragon head is very small at this scale, and one of the most difficult details to make is the eyes. I first made the head, "naked". For the mooth, I just made a line around it with the spatula. Then, I did 2 small holes for the eyes :
:
And don't forget to make the shell on each leg !
STEP 6 : Making of the Wings : This is a delicate step. Wings are thin, but must be resistant. First, try to find a kind of cardboard which is going to be both thin and stiff. That's why I cut a piece of file cardboard (those we use in my office ^^) :
Then, I make the arm which is going to be fixed on the dragon body. Cut 2 pieces of wire. With the pair of pliers, try to give them the arm form. Then, stick both of them on each wing with putty : it would be easier to work :
except if you want to have "plane" wings. Then, apply the putty in order to obtain the shell effect on the both side of the wings :
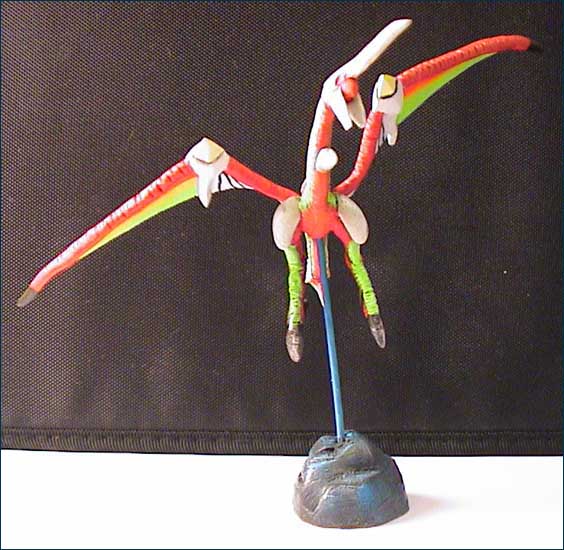
STEP 7 : Painting : Well, I'm not a good figure painter in fact, so I have not any advises to give. I just recommend Citadel paints (Warhammer), and some good paintbrushes.
|